Showing posts with label fotd. Show all posts

May 30, 2012

Mod Inspired FOTD, Urban Decay Lashes

This Face of the Day (FOTD) was inspired by the Mod look of the Twiggy era.  Big lashes and white liner!


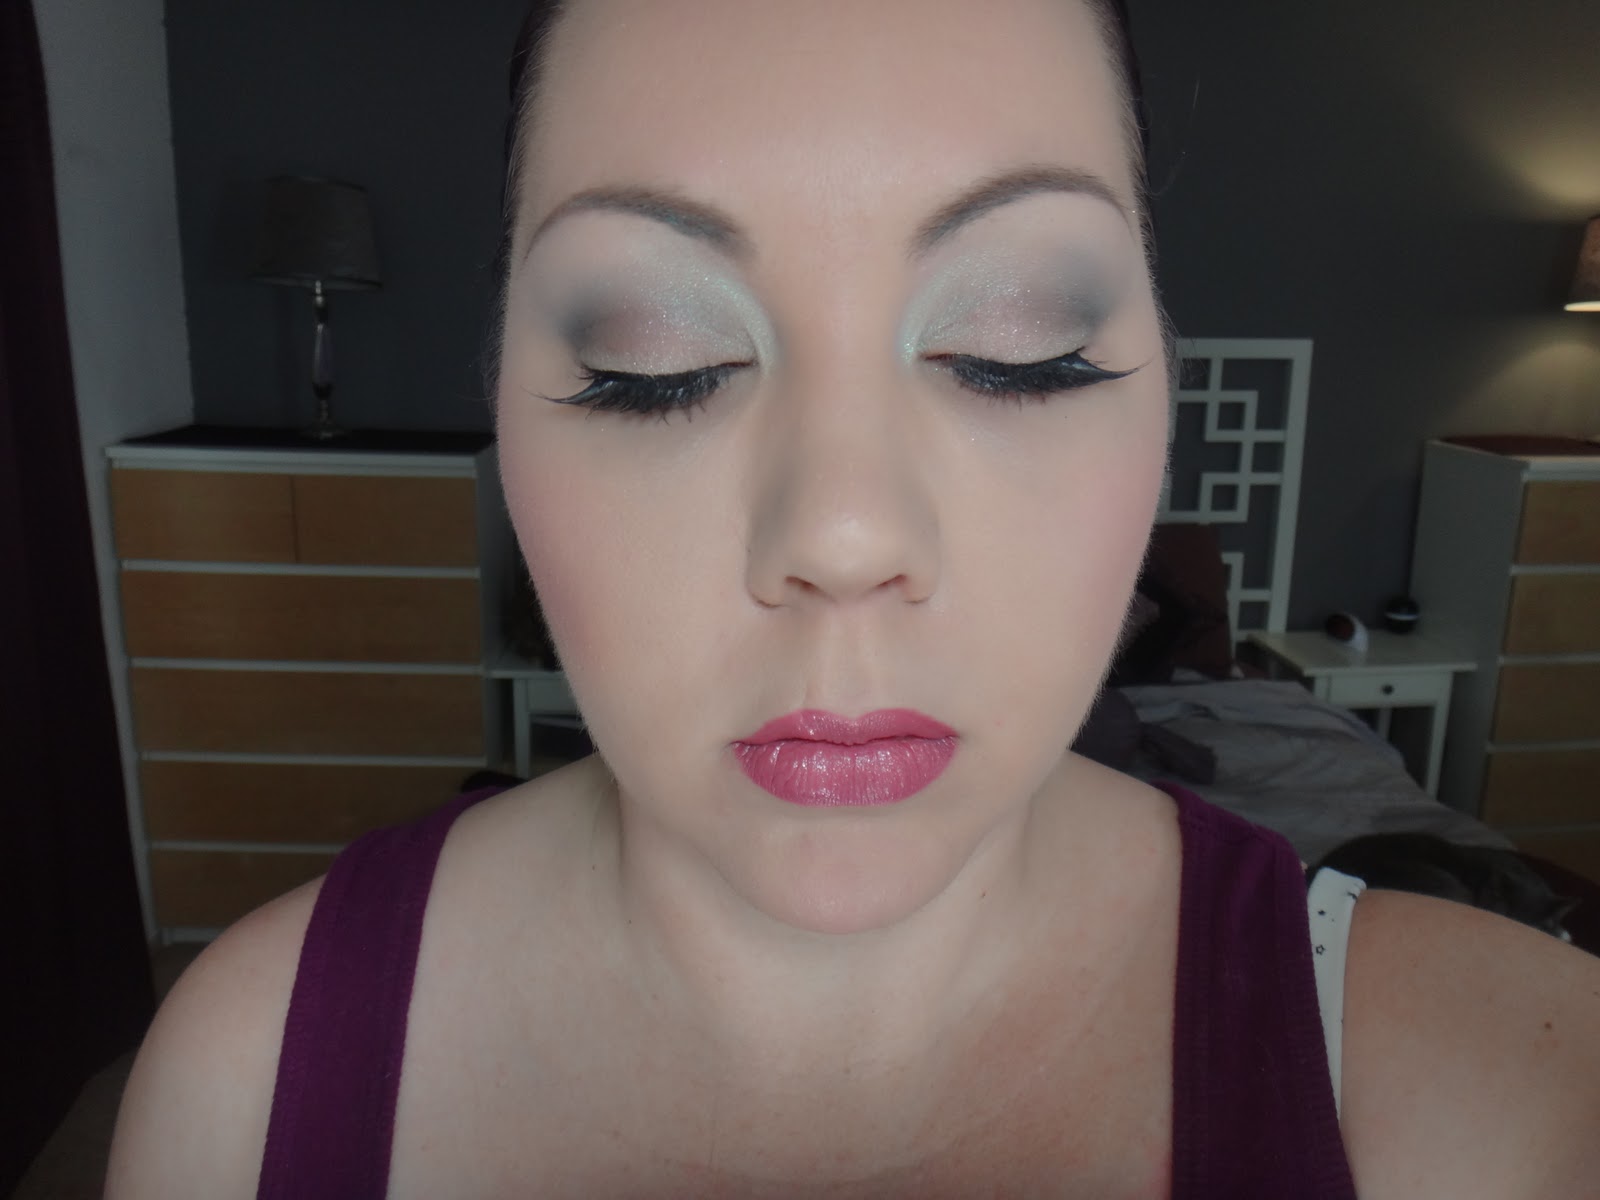
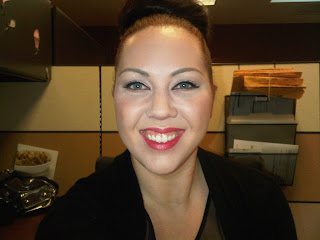
This look was created using a surprisingly small number of products.  Sometimes its not how many items you use, but the way you use them.  Blending was absolutely essential for this look to avoid any harsh lines.  The goal was to create contours and gradients which had no beginning or end to them.

See the full product breakdown and more pictures below:

Face:
Estee Lauder Daywear Moisturizer
Benefit POREfessional Primer
LOreal Visible Lift Foundation, #160 Classic Ivory
MAC Studio Fix Powder in N4

Cheeks:
Illamasqua Blusher in Nymph

Eyes:
MAC Painterly Paint Pot (all over lid and browbone)
Bobbi Brown Black Velvet Sparkle Eyeshadow (crease blended, a lot)
Jessie's Girl loose shadow in Secret Weapon (inner tear duct, lightly dusted over lid)
Lorac Front of the Line Pro Liquid Liner in Black
Urban Decay Lashes - Lure

Lips:
MAC Lipliner in Just Wonderful (Limited Edition)
No7 Poppy Collection Lipgloss in Glamour


February 16, 2012

Pinch Me Peach Tutorial


I've been pushing my boundaries lately, and the boundaries of my collection, by trying out the multi-purpose options that products provide.  For example, did you know that a blush can be used as a blusher, eye shadow and lip color?  One product, 100s of uses. 

For today's tutorial, I use two Illamasqua blushers to create a peach sunset inspired look.  Check out more photos after the jump!

<iframe width="560" height="315" src="http://www.youtube.com/embed/UP54YKlAEww" frameborder="0" allowfullscreen>iframe>

To create this look I used the following products:


Too Faced Primed and Poreless Primer
L'Oreal Visible Lift in Classic Ivory
NARS Albatross highlighter
MAC Trimmed in Pink Lipliner
Revlon Lip Butter in Peach Parfait


Illamasqua Blusher in Hussy
Illamasqua Blusher in Lover
MAC Shroom
MAC All That Glitters
Stila Smudgestick in Stingray
L'Oreal Voluminous Mascara in Waterproof black


February 7, 2012

My favorite part of having "girl time" is being able to play with, talk about, and test out makeup.  My friends are endlessly patient with my love of trying new things and often end up being my "test subjects" for new looks.

This weekend I was able to try out an Amber Look on my friend Christine; full list of products after the jump!

Before:


After:


Face:
MUFE HD Foundation in #118
MAC Mineralized Skin Finish in Light Medium and Medium Dark
MUFE Bronzer/Highlight duo in #2

Eyes:
Urban Decay Primer Potion
MAC Vanilla Pigment (inner corner)
MAC Brule (browbone)
MAC Amber Lights (lid)
MAC Cork (outer corner, crease)
MAC Espresso (Outer V)
Urban Decay 24/7 Liner in Demolition
L'Oreal Voluminous Mascara in Black

Cheeks:
MAC True Romantic
Eve Pearl Highlighter Trio

Lips:
MAC Cosmo
MAC Lovelorn (center bottom lip)

January 24, 2012

Fresh Spring Bridal Before and After

Before
 
After


Just a quick before and after of a bridal trial.  This bride was  having a Spring wedding and requested to look put together without being over done.  The main ingredients for this look were:

Face:
Eve Pearl Foundation - Light
Laura Mercier setting powder - translucent

Eyes:
MAC Vanilla Pigment
MAC Cork
MAC Wedge
Urban Decay 24/7 liner in Bourbon
Lorac Front of the Line Pro in Brown
LOreal Voluminous Mascara in Brown
Ardel Demi Wispies in Brown

Cheeks:
Benefit Coralistia

Lips:
MAC See Sheer

March 28, 2011

Top Knot: Go Big or Go Home


Check out my bouffant top knot! Go BIG or go HOME, right?


Sometimes a fun hairstyle makes me stand straighter and walk taller. In this case, the hairstyle itself gave me a couple of more inches!


Creating this look was so much more simple than I thought:


1. Smooth hair into a very high ponytail. I like to turn my head upside down to make sure that the back is smooth and straight. Use hairspray to keep fly-aways in check and some Moroccan Oil to put the shine back in there.


2. Using a boar bristle brush, or teasing comb, get to ratting! Tease the heck outta that pony tail. The goal is to look like your ponytail needs it's own zip code! Bigger IS better!!


3. Smooth down the outside layers of the tail with your boar bristle brush being careful not to brush out the rat. Grip the the ponytail ends, and start to twist into a loose bun.


4. Pin where necessary and then shellac that baby!


One great tip I have for creating a nice round shape is to use the pointed end of a comb or brush to pull and shape the hair. Just stick the pointed end into the bun and lift up gently to mold it.


Pro Tip: An oval shape top knot is more flattering than round, so go egg-static with your shape!